UTMB Health offers private and secure video appointments, accessible from the MyChart website or MyChart mobile apps. For the best experience, we recommend using a laptop with integrated camera and microphone or a mobile device to conduct the video appointment.
Please follow the directions below prior to scheduled video visit to have the best experience. If you have any questions, please call the MyChart Patient Support Line at (409) 772-4278.
- Use Wi-Fi or a high-speed internet connection to ensure quality video.
- If using a PC or laptop, ensure you have a video camera and microphone that are connected and tested.
- Remember you must log into MyChart to join your private and secure video appointment.
- Consider being in a private setting where you can talk freely.
- Avoid distractions during the visit (doorbells, phones, children, pets, etc.) and mute background noises like TVs and music.
- Try not to sit with a window or bright light behind you. For the best video quality, have a bright light source in front of you.
-
Proxy instructions
If a proxy is joining a video visit that was scheduled for a patient, the proxy must login to UTMB Health MyChart with their own account and then access the patient’s account via the proxy activity. Once the patient’s MyChart account is accessed via proxy, follow the below instructions for accessing the video visit.
-
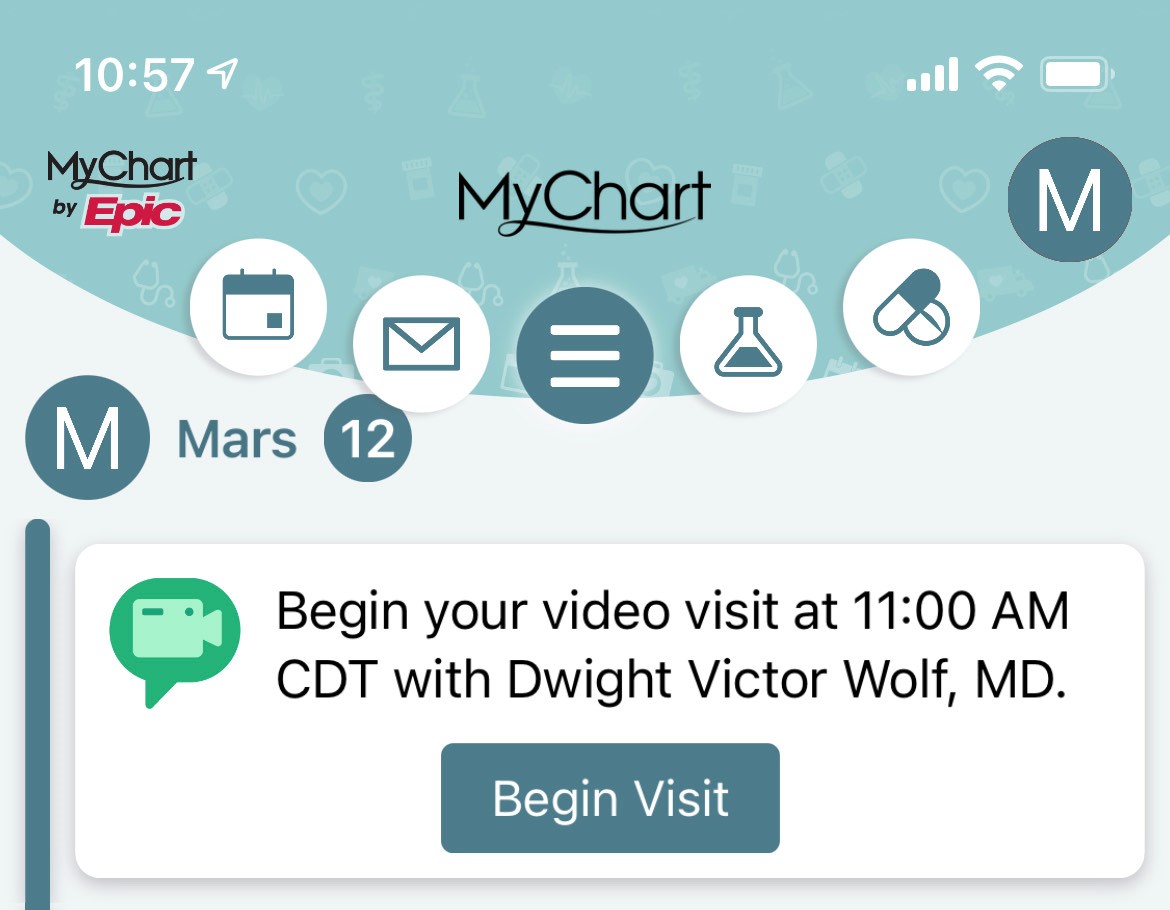
Step 1 - Access your Video Visit Appointment
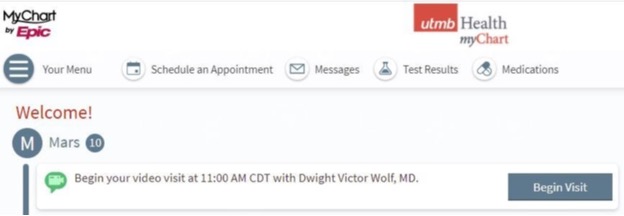
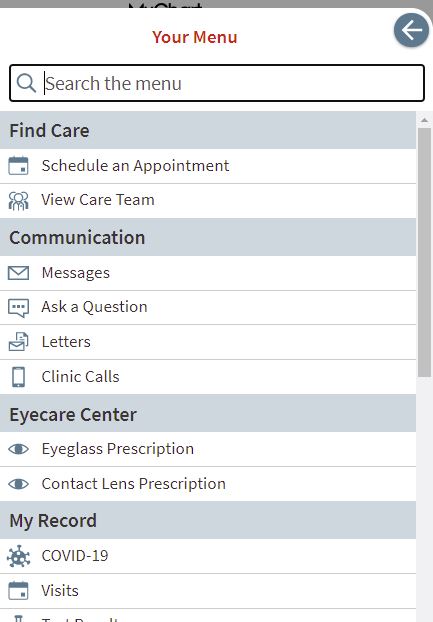
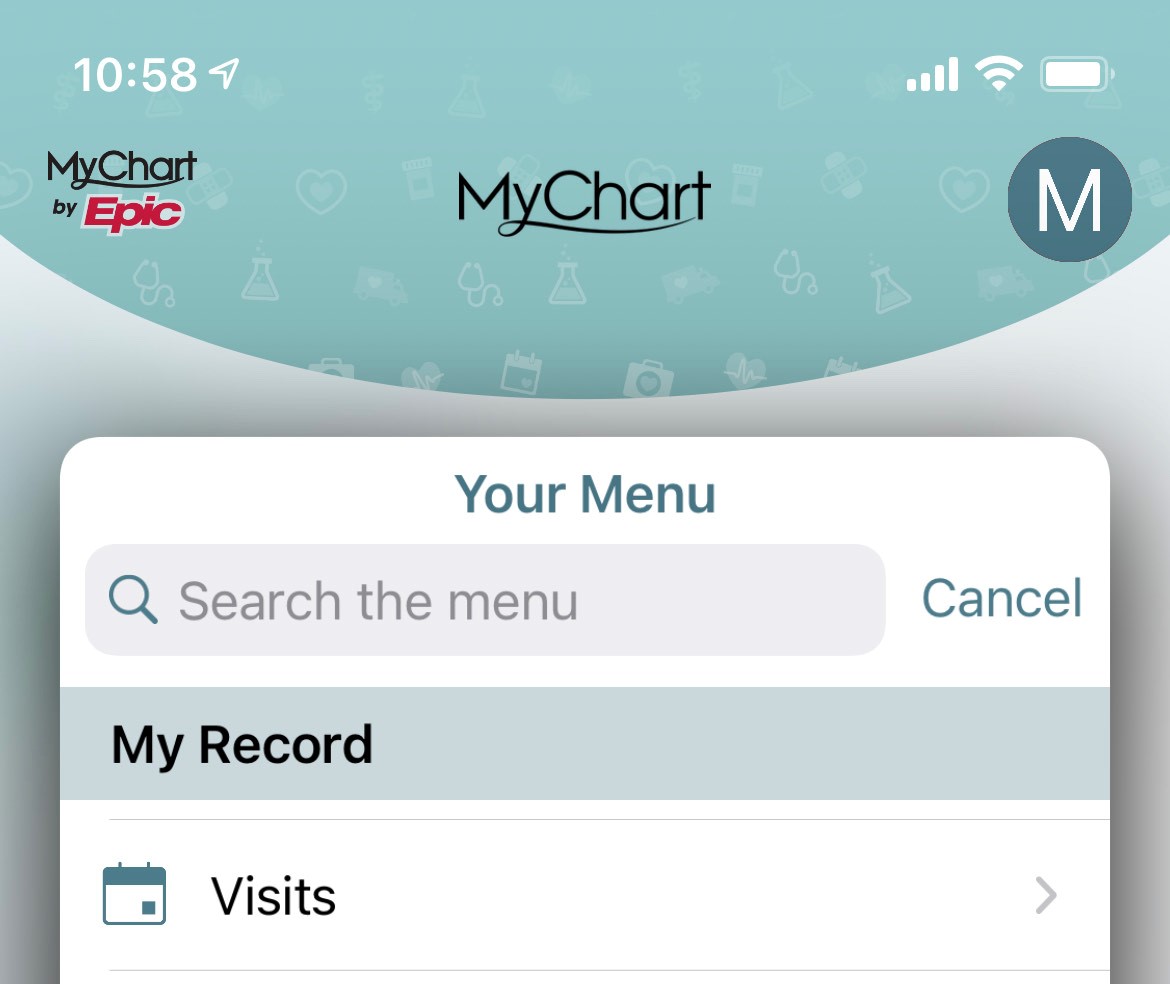
15-30 minutes prior to your appointment time, log into the MyChart website and access your upcoming Video Visit appointment by clicking the alert on your MyChart home page or by navigating to Visits from the navigational menu
-
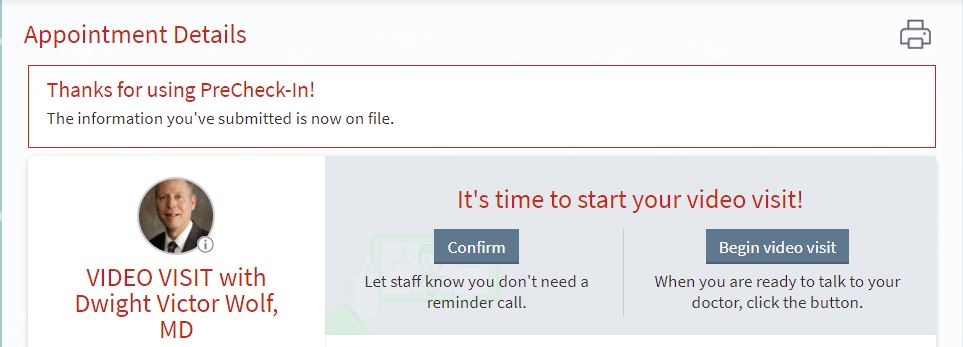
Step 2 - Complete PreCheck-in
Find your video visit in your list of upcoming appointments and click the PreCheck-In Button.
Complete PreCheck-In for the appointment. You will be asked to verify your demographics, insurance information, and your clinical information. You may be prompted for a visit co-pay, to E-Sign consents, and to complete questionnaires.

-
Step 3 - Begin the Video Visit
Once you have completed PreCheck-In, you can join the Video Visit. Click the Begin Video Visit button to launch the video visit.
-
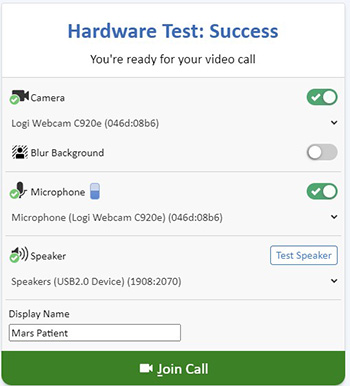
Step 4 - Hardware Test
Clicking the Begin Video Visit button will launch a new browser window and open to a hardware test screen where you can select and confirm that your microphone and video are working. Once everything is working, press “Join Call.”
-
Step 5 - Join the Video Visit
You will be brought to waiting room. You will be joined with the provider once they start the video visit.
-
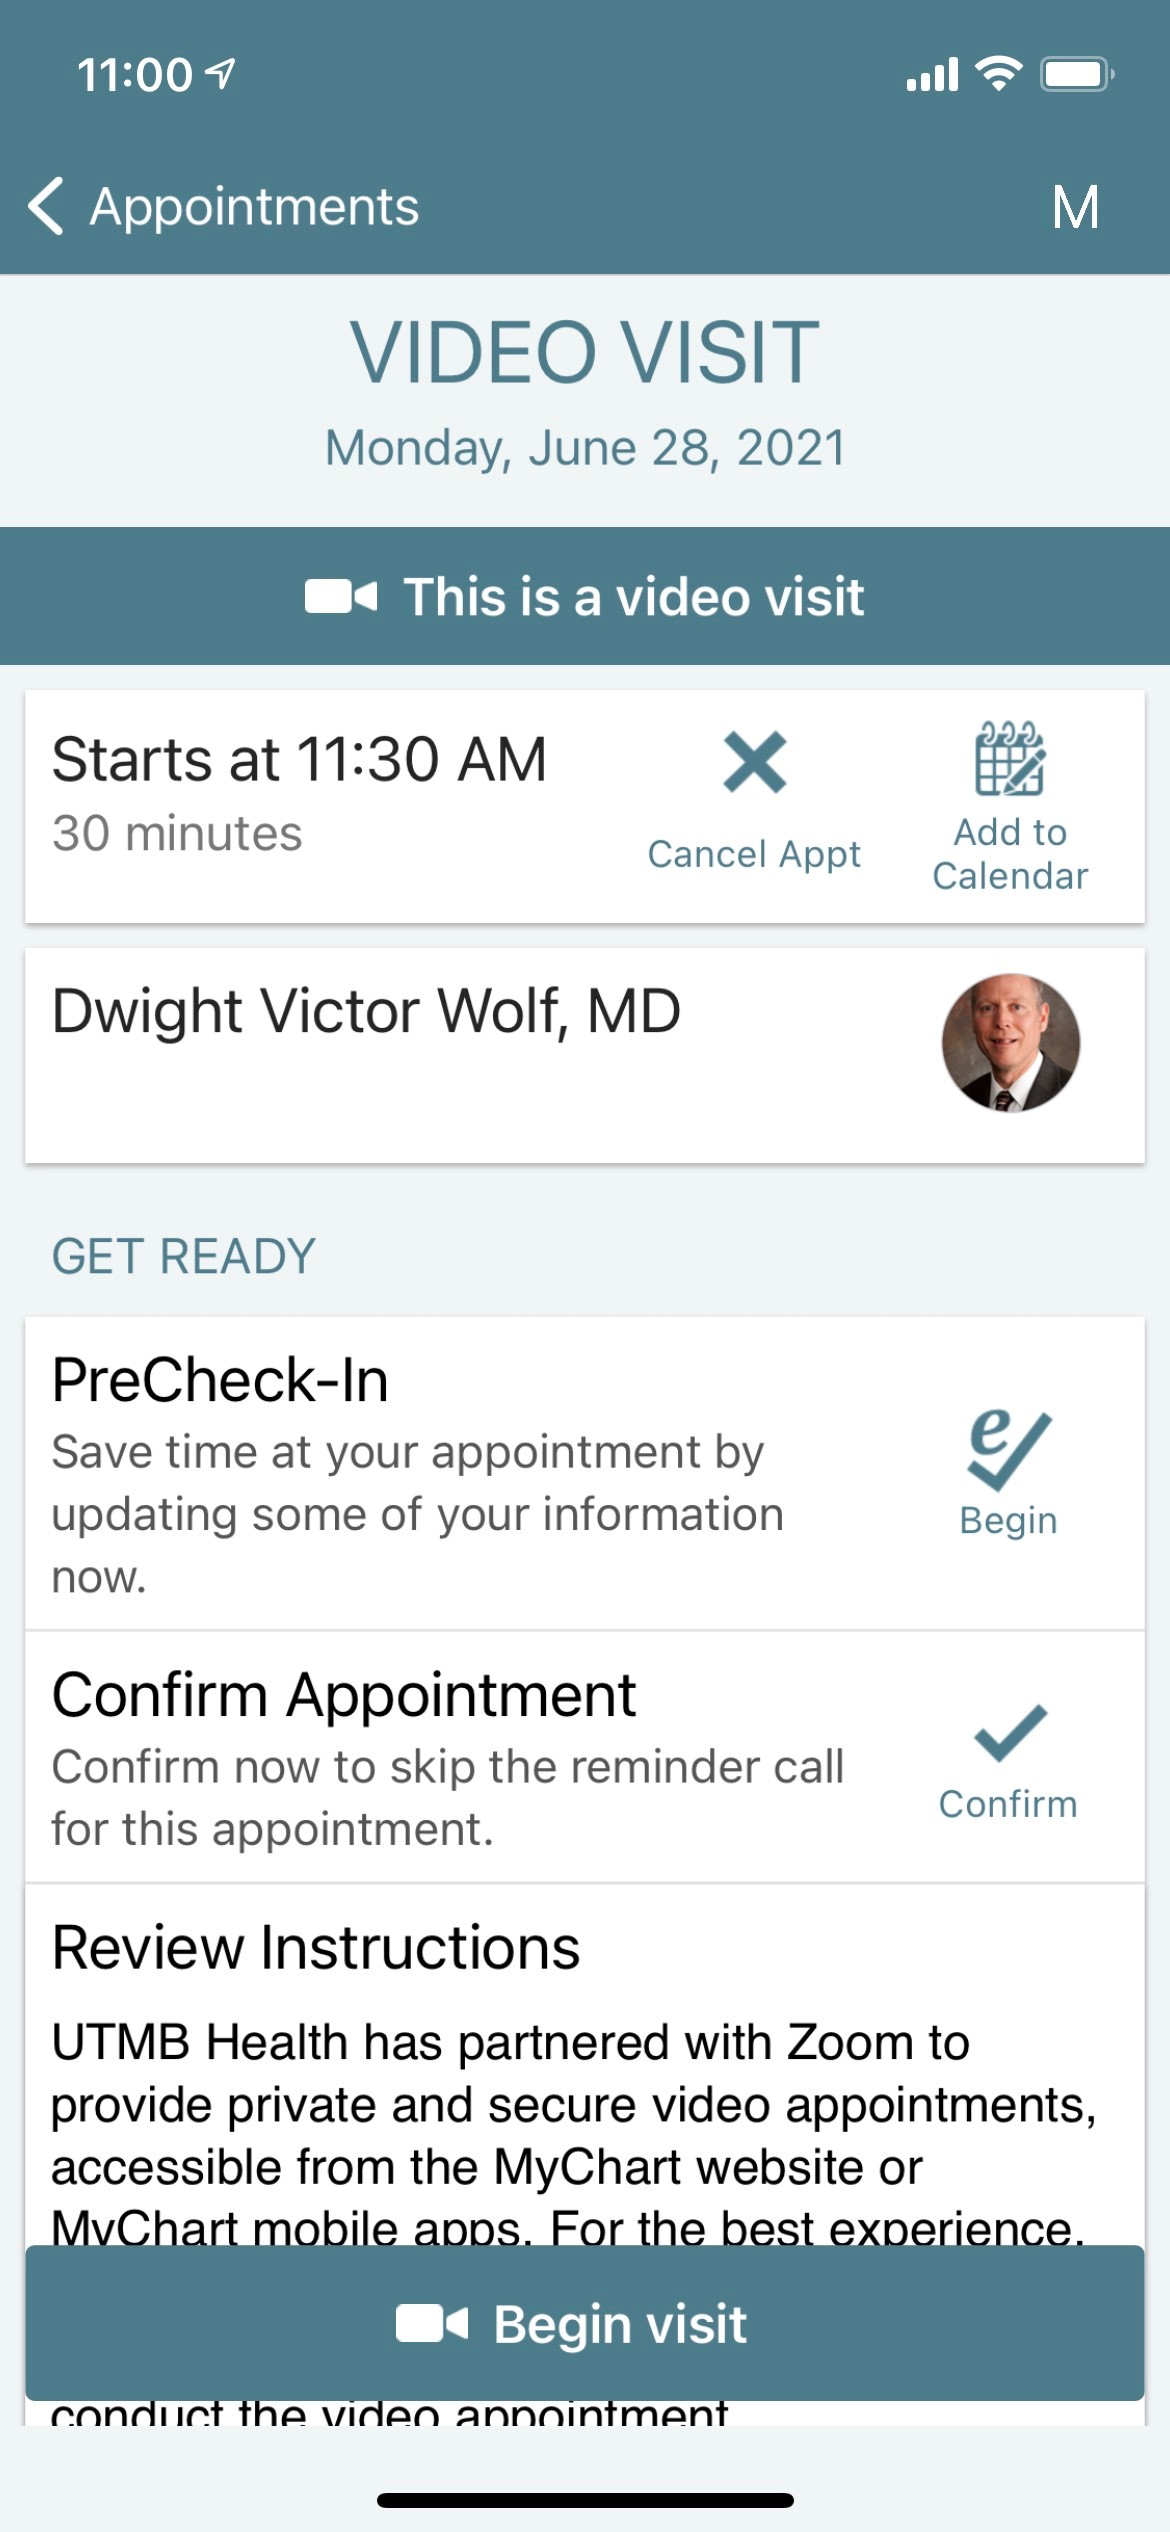
Step 1 - Mobile App - Access your Video Visit Appointment
15-30 minutes prior to your appointment time, log into the MyChart App and access your upcoming video visit appointment by clicking the alert on your MyChart home page or by navigating to Visits from the navigational menu.
-
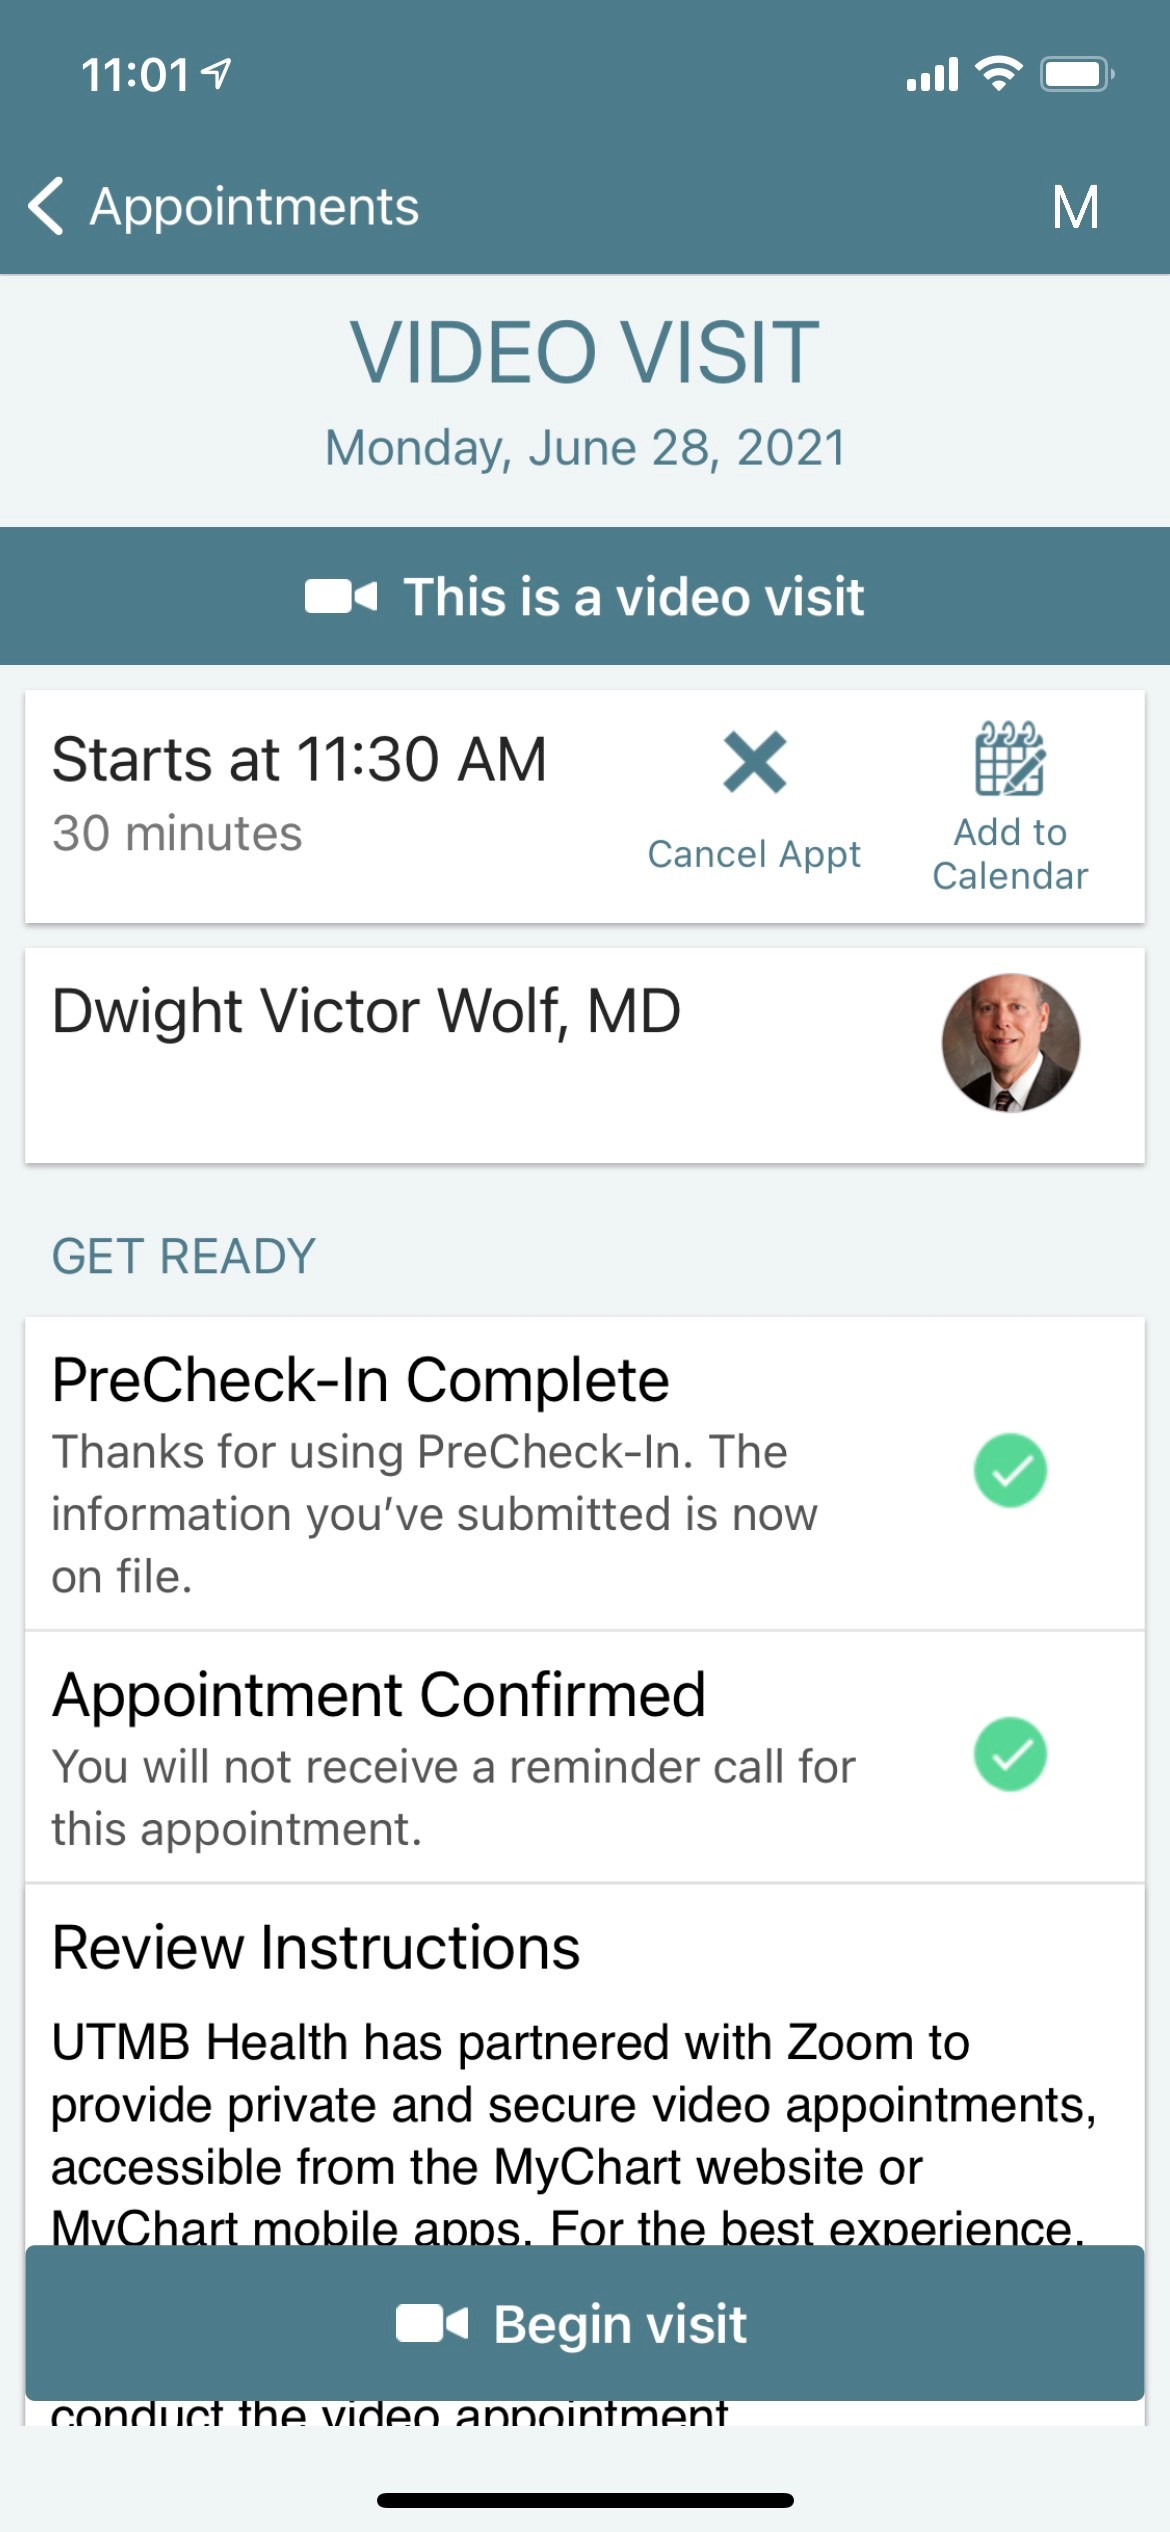
Step 2 - Mobile App - Complete PreCheck-in
Find your video visit in your list of upcoming appointments and click the PreCheck-In Button.
Complete PreCheck-In for the appointment. You will be asked to verify your demographics, insurance information, and your clinical information. You may be prompted for a visit co-pay, to E-Sign consents, and to complete questionnaires.
-
Step 3 - Mobile App - Begin the Video Visit
Once you have completed PreCheck-In, you can join the Video Visit. Click the Begin Visit button.
-
Step 4 - Mobile App - Hardware Test
Clicking the Begin Video Visit button will bring you to a hardware test screen where you can select and confirm that your microphone and video are working. Once everything is working, press “Join Call.”

-
Step 5 - Mobile App - Join the Video Visit
You will be brought to waiting room. You will be joined with the provider once they start the video visit.
Access your medical record 24/7
Download the App!

Apple and the Apple logo are trademarks of Apple Inc., registered in the U.S. and other countries. App Store is a service mark of Apple Inc., registered in the U.S. and other countries. Google Play and the Google Play logo are trademarks of Google LLC.